
Embroidery has been adopted by young and old in recent years, with the revival of traditional and amazing creations made with the help of embroidery machines.
You can create a beautiful wedding dress or a gift for a baby shower. You can personalize caps and shirts by creating logo designs and caps, and many endless possibilities are available.
If you are thinking or just starting embroidery, you need to know where to start it. There are many embroidery machines available in the market. Using an embroidery machine is pretty different from using a sewing machine. Learning How to use an embroidery machine can turn out to be a difficult task, especially if you are a beginner and have no experience of using an Embroidery machine at all.
In this article, we will provide you some details about How to use embroidery machines.
Steps to use an Embroidery machine
You have your nice and shiny new machine but don’t know where to start? This is pretty obvious, unpack your new embroidery machine and its accessories that come with it. All the machines have instructions manual. Read the instruction manual and learn about machine parts and their operations.
If you have a sewing and an embroidery machine. Set up the machine for embroidery before connecting the device.
1. Configuring the device
 Step1:
If you want to use your machine for hand embroidery, change the foot to hand embroidery. However, only at the beginning, it would be better, you can use a pre-programmed design on the device or, if the device has a USB port, you can download embroidery designs online and import them into the machine.
Step 2:
Plugin the device and connect it with a computer if required. You may also need to install the software on your computer. It usually comes with the computer in the form of a disk.
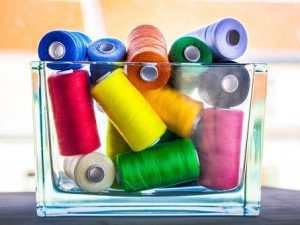
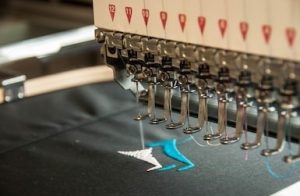
2. Use the right needle and thread.
For any embroidery project, it’s essential to use an embroidery-specific machine needle. It prevents thread breakage while embroidering. You can use ordinary thread for the thread, but the embroidery thread has a beautiful shine and makes the embroidery design pop and look professional.
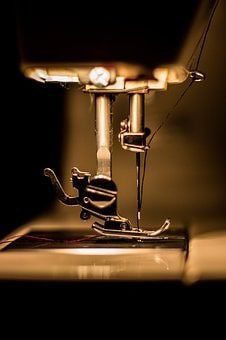
3. Set up the embroidery thread
 3. Set up the embroidery thread
Now it’s time to insert the machine into the machine. Follow the steps mentioned in the manual to make sure you get it right. If you have used a threaded sewing machine before then, this should be relatively easy for you.
Make sure that the thread goes through all the loops where it is intended. Failure to do so may cause your machine to pop with a warning and refuse to work.
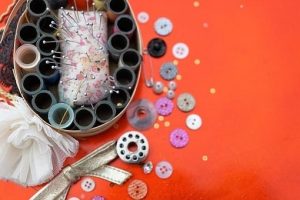
4. Insert the bobbin into the machine
Slide over the bobbin case and load the bobbin with the thread. Insert it carefully and make sure that you read the instructions carefully. There may be an instruction sticker on the side of the bobbin case on the machine that shows ho to insert the thread in it.
To set the thread correctly, use the wheel on the side of the machine to raise and lower the needle. The machine use thread from the top and the bobbin for embroidery. The bobbin thread will come up in a loop. Use something small, such as tweezers or small scissors, to pull the thread through.
The bobbin thread appears in the loop. Use something small, such as tweezers or small scissors, to pull the thread. Take the thread and lay it towards the back of the machine. Make sure the upper thread passes through the sewing foot and thread it backward with the lower thread.
5. Setting up the Embroidery frame and fabric
 5. Setting up the Embroidery frame and fabric
Set up the embroidery frame or hoop to embroider your design. Machines have different frame sizes. These frames will hold your fabric securely while the machine stitches. If your fabric moves during the work, then the design will not come out as it should.
Select the frame size according to the embroidery design you want to stitch. If you don’t choose the right frame, then it might not stitch properly.
6. Setting up the stabilizer
The stabilizer is used to stiffen or protect the material during sewing. By working with the frame, it helps to keep the fabric in place.
Depending on the material, different types of stabilizers are available. Some will be placed under the fabric and others on top. Some of them can be cut or torn off after designing. Others will dissolve in water or break down under the heat of iron.
When cutting the stabilizer, make sure it is slightly larger than the hoop size. Sew the fabric and stabilizer together. To do this, place them above the bottom of the frame. Then place the upper part of the frame over the fabric and lock or click in place.
Secure the stabilizer and frame by turning the knob of the frame. Stabilizers are best for the fabric that is not washable.
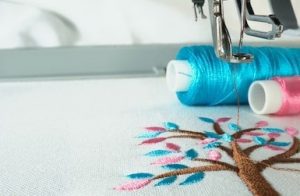
7. Embroid the designs
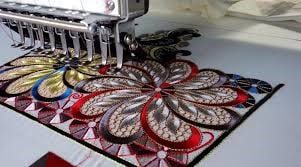 Now you are all set to create your beautiful embroidery design. Use the built-in designs or download them from the internet. Import the design and press the start button.
Remember to watch out for any warnings or messages on display. Press the Start button, and the machine will continue embroidering. You will repeat these steps until all colors are used, and the project is completed.
As a beginner, it is better to choose the one color thread once you have become familiar with it you can use a thread of different colors.
If you use a thread of a different color, you have to change the color after some time. The embroidery sequence will be displayed on the machine’s LCD screen. It will tell you which thread is needed next.
Remove the hoop and the stabilizer and admire your work.
Conclusion:
We have provided in detail How to use an Embroidery machine. Working with an embroidery machine is not difficult now. All you need to do is follow the guidelines provided above.


